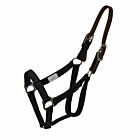
ThinLine Flexible Filly Grazing Muzzle

This muzzle is made from one of the most durable polymers on the planet. It is fungal, mold and UV resistant. It has taken years to get the right materials to work this well! It is safe, effective and durable.
Sizing Information:
Choosing What Size to Order
With your horses halter on with the nose band approximately 1/2 inch below the cheek bone measure from the d ring on the side of the halter around your horses mouth to the other d ring. The muzzle should fit lose so don’t measure tightly and don’t let your horse eat your measuring tool. The easiest way to do this is with a piece of string or baling twine and then measure the string. This measurement is also easier to accomplish if your horse’s nose is pointed to the ground.
From this measurement you can determine what size muzzle you will need.
Mini /Pony Muzzle:
Ranges from 14.5”/368.3mm to 18”/457.2mm across.
Basket size – diameter- 5.76”/146.3mm Circumference – 18.1”/459.74mm
Cob / Horse Muzzle:
Ranges from 14.5’’/368.2mm to 20 ¼”/514.35 across.
Basket size – diameter – 6.2”/157.48mm Circumference – 19.48”/494.792mm
Oversize/Draft Muzzle:
Ranges from 15 ¾”/400.05 to 22 ¼”/565.15 across.
Basket size -diameter – 6.78”/172.2mm Circumference – 21.3”/541.02mm
If your horse falls into 2 categories we suggest getting the smaller size unless you are within a ½ inch of the maximum of the top hole.
What you will need:
We recommend you commit a dedicated well-fitting breakaway turnout halter to your muzzle. The ThinLine Turnout Halter has been designed for use with this Grazing Muzzle, but any well fitting breakaway halter will work.
It generally takes about 10 minutes to get everything perfect the first time you install a Flexible Filly Muzzle. Subsequent halters will take about 3 minutes.
How to attach your Flexible Filly Grazing Muzzle:
- Use the enclosed paper ties or a string to discover the best holes to secure your muzzle to your halter. The paper ties are a temporary tool allowing you to easily adjust the fit.
- Two of the “fins” have a triangle cut out. These attach to the square (side) rings on your turnout halter. Three fins will connect to the nose band, one in the center, the other two fall naturally to the sides of center. Three fins will connect to the chin band; one in the center, two naturally to the sides of the center.
- First secure each triangle cut out fin with one of the enclosed low profile cable ties. Do not wrap the fins around the halter, doing so may cause rubs.
- When properly installed, the muzzle should be close to but not touching the nose of the horse. If the muzzle is touching the nose simply make the fins under the chin longer, this will lift the muzzle away from the nose.
- Once you are satisfied you have the correct holes aligned to the halter please remove the paper ties or string and permanently secure the muzzle with the included cable ties.
- After finding the best fit for your horse, simply trim the excess fin material just above the top hole being used. It is fine to wait a day or two to ensure your muzzle is a comfortable distance from your horse’s mouth prior to trimming. The “keeper” on the cable tie are on the outside of the muzzle and the excess is facing down and trimmed close.
If you have fitted the muzzle properly and the muzzle is the correct size it will work famously. If you find there is too much grazing room be sure your fins are snugly secured to your halter. The fins should not move along the nose band. If it does simply pull the cable tie tighter.
| Brand | ThinLine |
|---|